1. Timing Your Aurora Hunt
The best times to capture the Northern Lights are from September to March, with the peak months being October and February. Aurora tends to be better around the equinox, so in Canada, it’s better to plan your high-mountain or reflective lake aurora shots in the fall, and bigger mountain, and snow-covered vista shots in the winter.
The key is finding dark, clear nights and getting lucky with minimal moonlight. Use aurora tracking apps and websites like SpaceWeatherLive or Aurora Watch to monitor solar activity. I use AuroraAlerts, it was a one-time purchase and it lets me set alerts for specific conditions.
2. Aurora Factors (Intermediate-Advanced)
The conditions of Aurora are complex, and the terms are unintuitive. This is an over-simplified breakdown of the factors affecting aurora that might be reported by your app of choice.
KP Index (Geomagnetic Activity): Think of it as the “aurora score” from 0 to 9. The higher the number (KP 5 or above), the more likely you are to see the northern lights, and the further south they can appear.
- KP 0-2: Likely only visible near the poles.
- KP 3-4: You might see them in northern areas (like Canada, Alaska, or Scandinavia).
- KP 5+: A strong storm! Auroras could be visible farther south.
Solar Wind Speed: This is how fast solar particles are coming from the sun. Higher speed means more energy reaching Earth’s atmosphere, which makes brighter auroras.
- Speeds of 400-500 km/s are normal, but when it hits 600-800 km/s, auroras are more intense!
Solar Wind Density: This is the number of solar particles hitting the Earth’s atmosphere. More particles mean stronger auroras.
Bz or Bt (Magnetic Orientation): This measures the direction of the solar wind’s magnetic field.
- Bz is negative (-), it’s like unlocking a door—the solar wind can more easily interact with Earth’s magnetic field, making auroras stronger.
- Bz is positive (+) is like locking the door—it’s harder for the solar wind to create auroras.
What’s more, if the Bz makes a big drop, it’s a good sign things are going to get more intense.
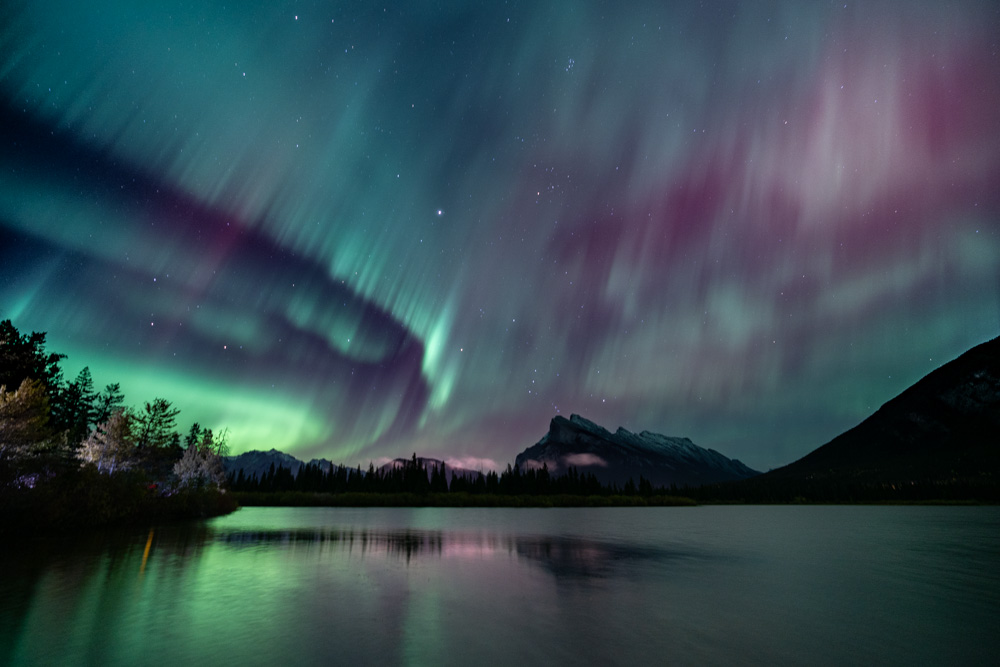
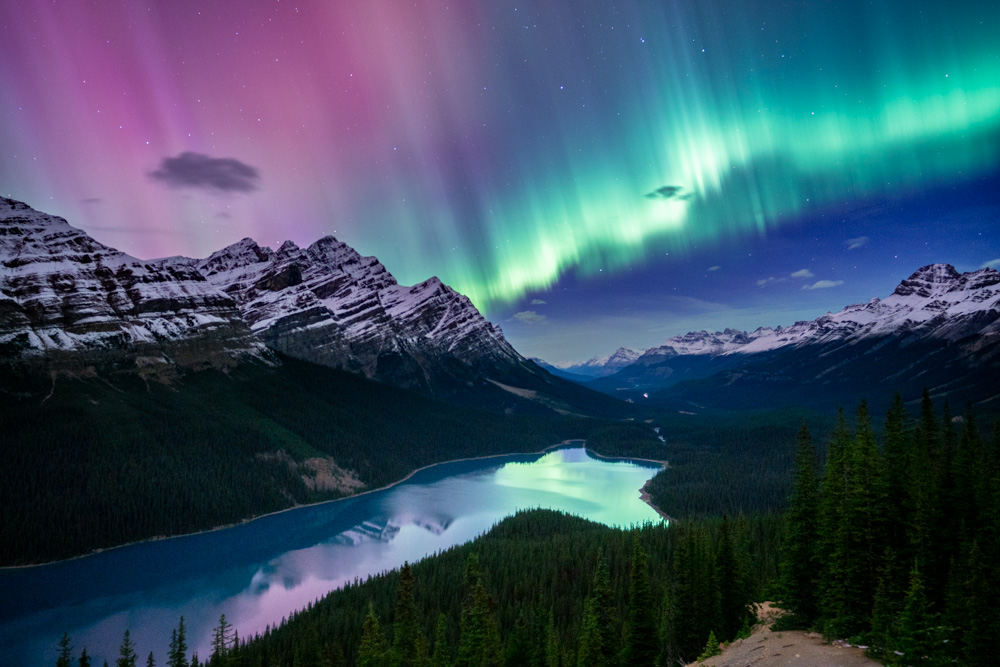
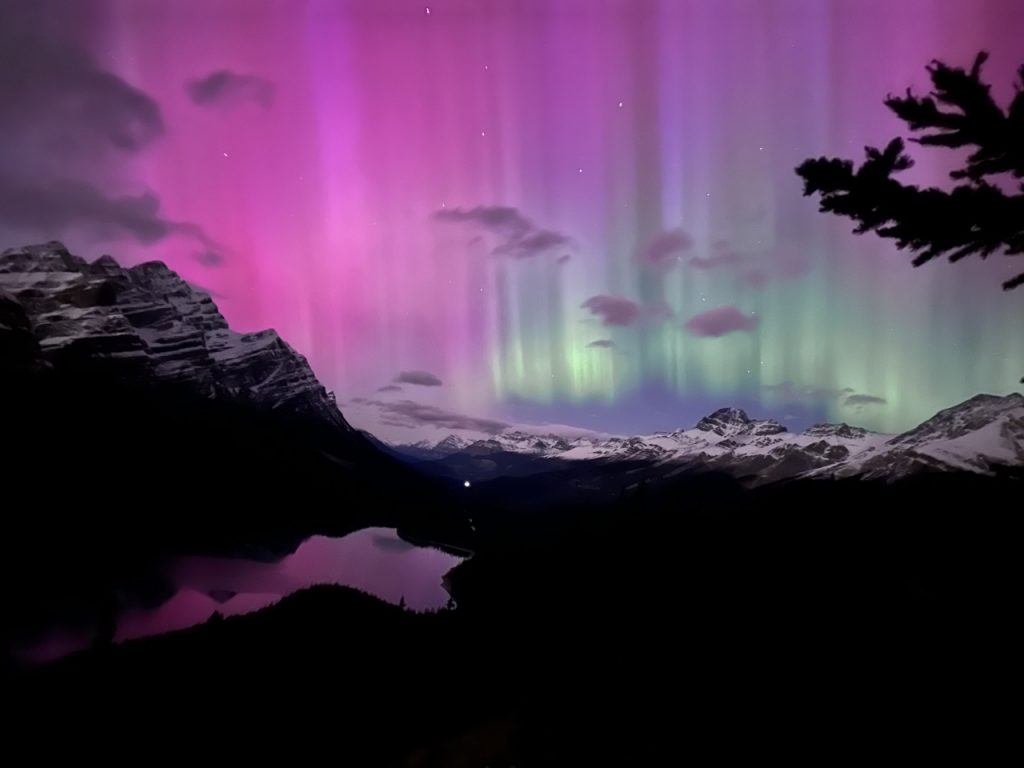
3. Choosing the Right Location
The Canadian Rockies offer stunning backdrops for aurora photography. On smaller storms, prioritize viewpoints that face North. This is where the aurora will be strongest, and on small KPs it may only be visible on the horizon. Additionally, you should look for places far from city lights to avoid light pollution. Some ideal locations include:
- Jasper National Park: A designated Dark Sky Preserve, Jasper offers excellent opportunities to shoot the aurora, especially around Pyramid Lake.
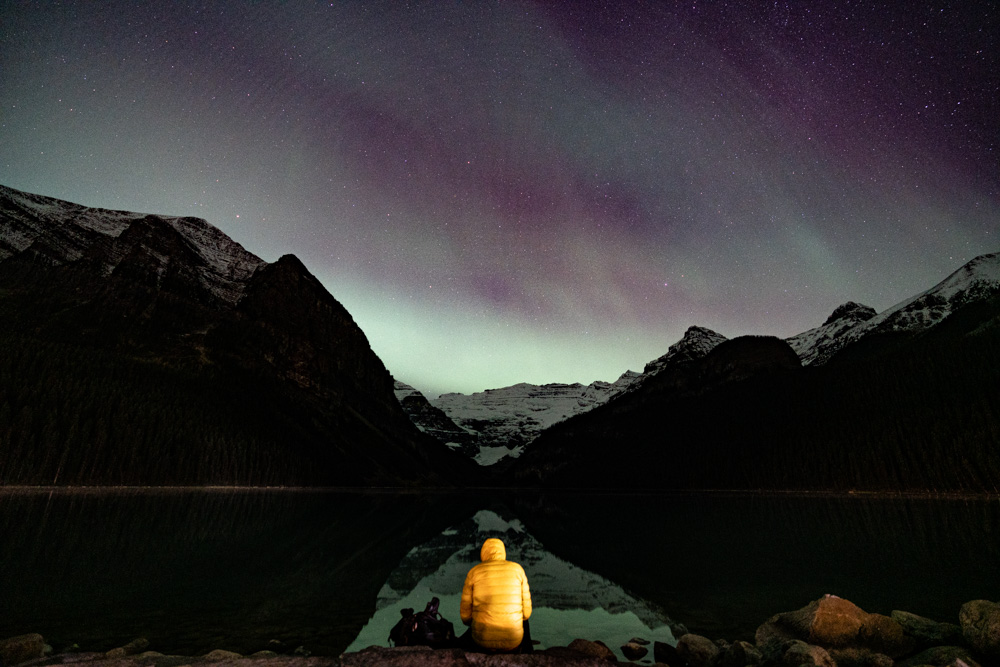
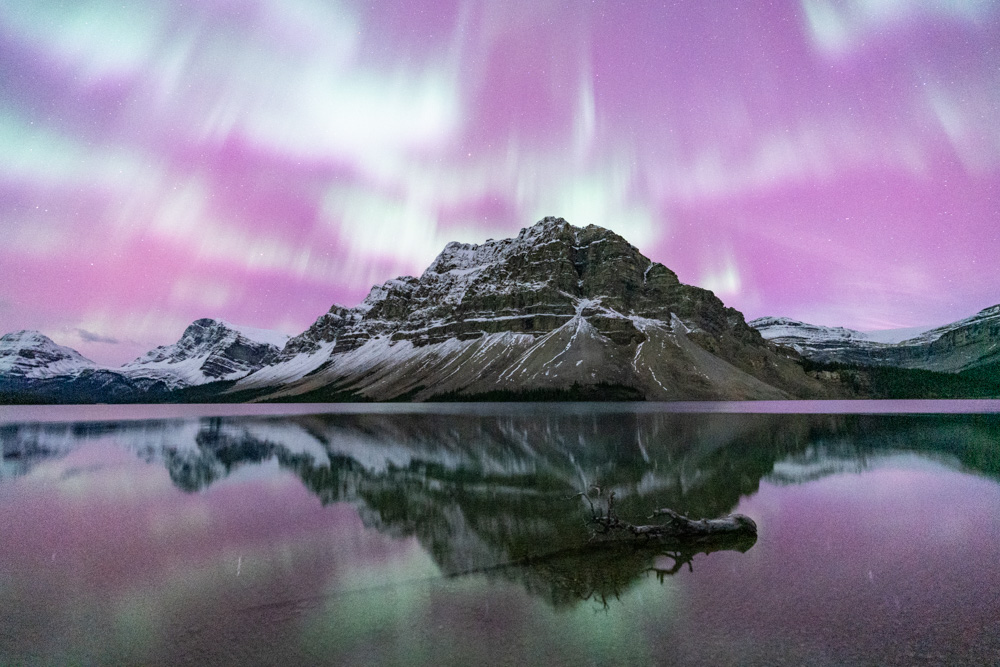
- Banff National Park: Lake Minnewanka and Vermilion Lakes provide beautiful reflective surfaces for aurora shots.
- Abraham Lake: Famous for its frozen methane bubbles in winter, this location adds unique foreground elements to your photos.
4. Essential Gear
For photographers with a camera that has manual control:
- Camera: Manual control makes it easier, but newer phones do a fine job! As a general rule, the bigger the sensor, the better.
- Wide-Angle Lens: A fast, wide-angle lens (f/2.8 or lower) helps capture more of the night sky.
- Tripod: For long exposure shots, a sturdy tripod is non-negotiable to avoid camera shake.
- Remote Shutter/Intervalometer: This helps reduce camera shake and allows you to take multiple shots without touching the camera. You can always use the “time-delay” function if you want to replicate this functionality.
- Extra Batteries: Cold temperatures drain batteries faster, so bring spares and keep them warm.
For photographers using a phone, consider bringing a tripod with a phone mount. (Did you know the Peak Design Tripod has one built in?). You can definitely handhold, but if you want to try timelapses, tripods are essential.
iPhone settings (no specific order):
- Use Night mode (iPhone 11 and later) or manual mode (third-party apps).
- Set exposure: 10 – 30 seconds
- ISO: Start between 200 – 400 and adjust as needed
- Focus: Manual or Infinity
- Use a 3-second timer to avoid any camera shake
- Turn on RAW Max if it is available on your phone to get the best quality
Android settings (no specific order):
- Use Pro/Manual/Night mode
- Set exposure: 10 – 30 seconds.
- ISO: Start between 200 – 400 and adjust as needed
- Focus: Manual or Infinity
- Use a 3-second timer to avoid any camera shake
- Turn on RAW if it is available on your phone to get the best quality
5. Camera Settings
So there are lots of ways to go about this. A lot of photographers use (M) mode to iterate on their shots. I prefer Aperture Priority (A) mode set to your biggest aperture [lowest number] (in my case f/2.8), and then use exposure compensation and iso to change the exposure.
- Mode: Switch your camera to manual mode (M) for full control.
- Aperture: Set your lens to its widest aperture (e.g., f/2.8 or lower) to let in as much light as possible.
- ISO: Start at ISO 800-3200. Experiment based on your camera’s capabilities—a higher ISO will allow shorter exposures but might introduce noise. I’ve found 1600 to be a sweet spot, but if your camera handles noise better, feel free to pump it up!
- Shutter Speed: A starting point is 5-15 seconds. Aurora activity can be fast or slow, so adjust accordingly. Shorter exposures (3-6 seconds) work best for active auroras, while slower/dimmer auroras may need longer exposure.
- Focus: Manually focus your lens to infinity. Use live view to zoom in on a distant bright object, like a star, for precise focusing. It’s best to test your lens/body combination in a bright environment first and note the best focus distances for your camera.
6. Composition Tips
If you can, scout your locations beforehand. In the Northern Hemisphere, it’s best to find viewpoints that face approximately North, with the horizon visible. This will maximize your chances. For stronger storms, you can include south-facing aspects. The higher / flatter you are, the further you’ll be able to see.
- Foreground Elements: Incorporate interesting foregrounds like mountain peaks, people, frozen lakes, or silhouettes of trees to add depth to your shots.
- Reflection: If near a body of water, capture the aurora’s reflection for a mirror-like effect.
- Rule of Thirds: Follow this basic photography rule by placing the aurora on the top two-thirds of your frame and foreground elements in the bottom third.
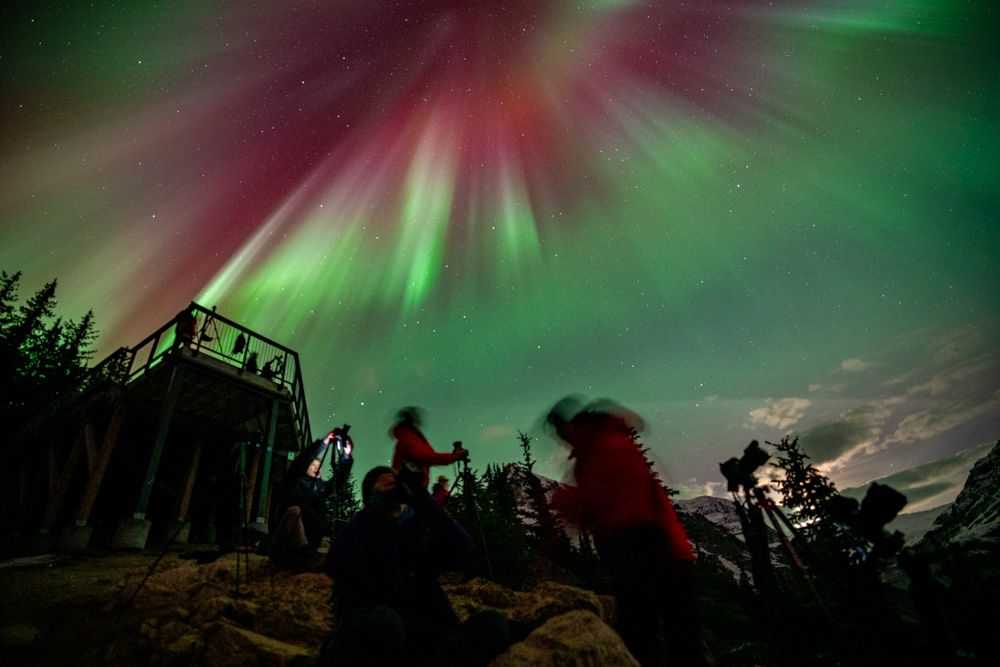
7. Managing Cold Weather
Winter nights in the Rockies can be extremely cold, so dress in layers and bring hand warmers. You’ll be not moving for long periods, so ensuring your fingers and toes are warm is essential. Bring a warm drink and/or a chair to keep you off the ground. Have patience, we can only accurately predict aurora about 10 minutes in advance, so it could go from 0-60 fast.
8. Post-Processing
After capturing your shots, post-processing can bring out the details and colors of the aurora. Use software like Adobe Lightroom or Photoshop to adjust exposure, contrast, and color balance. Be careful not to over-edit—the goal is to enhance, not alter, the natural beauty of the aurora.
Happy Aurora Hunting!
Leave a Reply